There were a couple of challenges here: I needed to make them as cheaply as possible and they were supposed to be outside, so I figured they needed to be semi-weather proof.
These two requirements ruled out some of the options for the top part of the tree that I had found online (feathers and tissue paper, for example).
I suppose the idea I ended up with came from piñatas. I wanted to have something with movement but couldn't figure out how to do it! And then I thought about piñatas and how the tissue paper is cut for the store bought ones. It makes them fluffy. It makes movement. How would I do that? How could I make something like that without using tissue paper?
Figuring it out was a true "Aha!" moment, and here's how I did it:
For the Paper Mache Tree Top:
~ Flour
~ Water
~ Lots of Newspaper
~ 17 Inch Balloon
Who gets the newspaper anymore, right? I certainly don't! I got mine (and I needed A LOT, because I made 10 of these things) from friends in my ward and a trip to the recycle bin by the mailboxes for some good 'ol fashioned recycle bin divin'. The community papers that everyone gets (and no one reads) were perfect! And abundant! Though the weekly ads also sufficed. Stay away from ads where the paper is super shiny. That paper won't work! Plain newspaper works best.
I had to special order the 17 inch balloons. I needed something more rounded (and bigger) than the standard 12 inch balloons they sell at the store. I got the special outdoor display balloons (BargainBalloons.com) and they worked great! Though now I have 62 of them left. (I will never need to purchase big balloons ever, ever again.)
Paper Mache Glue Recipe:
~ One part Flour
~ Two Parts Water
My container was kind of small so for me this meant 1 Cup water and 1/2 Cup flour. A wire whisk works great to get all the lumps out.
Paper Mache Tips:
~ Try to find a work space that stays at roughly the same temperature all the time. The air inside the balloon expands and contracts according to the room's temperature. It can crack your paper mache if the balloon expands or cause it to wrinkle if the balloon contracts.
~ Longer strips worked the best (8-10 inches)
~ You'll need to do 4 to 5 layers.
~ Alternate your strips between vertical and horizontal with each layer. It helps you keep track of what layer you're on.
Once you've completed your last layer and allowed your paper mache to dry thoroughly, deflate the balloon and pull it out through the hole. I cut the hole a little bit bigger with some scissors (only about a 1/4" or so).
Note: I had a couple of tree tops crumple when I deflated the balloons. There's no need to panic if that happens to you! Just gently pop the globe back out to the right shape (I used the PVC pipes I had on hand to do it since the hole was so small) and add another layer or two of paper mache on the weak spots to strengthen the structure of the globe.
For the Tree Fluff:
~ Plastic Tablecloth
~ Scissors
~ Hot Glue Gun & Lots of Glue
I got my plastic table cloths at Party City (they were 3 for $5 - score!). One table cloth will make two Truffula Trees (add that to your bank of useless knowledge).
Lay it out lengthwise on the floor, still folded the way it was in the package. You should have four 'layers' of plastic. You'll need to cut the folds on both sides by sliding your scissors between the layers (one side you'll cut through just one layer of plastic, the other side will be two) so that you have four separate layers when you're done.
Then cut the layers into strips about 2 to 2 1/2 inches in width. I was able to get five strips from each table cloth.
Fold your strips in half lengthwise, twice. Cut little strips along one side of the folded strip to a little beyond the midpoint of the strip. Continue cutting strips until you've reached the end.
The next step is to glue the frills to the paper mache globe.
The number one thing to remember here is that you want the plastic to lay flat!

You'll need your trusty scissors again to cut slits in the plastic on the uncut side of the frill so you can make your straight frills fit your round object. I found that near the center, there is less need for this.
Just know that if you have puckers, that's when you know you need to cut a slit.
~ 3/4" x approx 5' PVC Pipe
~ White, Yellow & Black Acrylic paint
~ Electrical tape
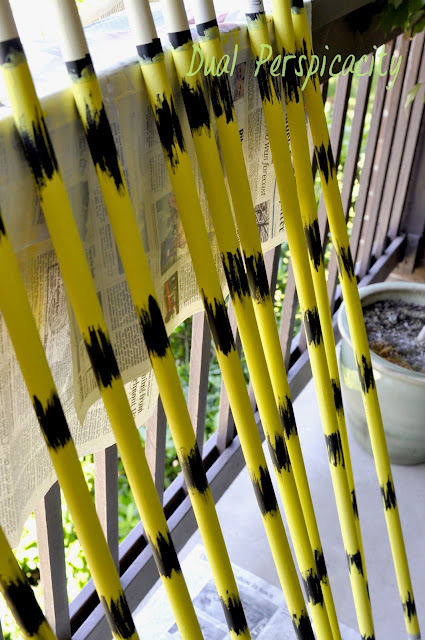
I tried spray painting these (didn't work!). Acrylic paint worked great though.
I marked off the portions of the pipe I wouldn't need to paint - the bottom, which would be driven into the ground and the top, which would be inside the balloon. Then I did a layer or two of white paint over the writing on the pipes before painting the yellow. I still needed several layers to cover everything. Then I used black paint for the finishing touches.
Drive the short unpainted end of the PVC pipe into the ground and put the globe on top and you're done!
I really enjoyed doing this project after I figured out how I was going to do it.
Making the fluffy tops was my favorite part!
From Instagram:


No comments:
Post a Comment