It's been a long time since I posted anything. I was kind of surprised that my last post was only three months ago. It seems like it's been longer.
I have been crafting, as usual. I've had birthdays and Halloween and Christmas prep. Also, I've been doing NaNoWriMo - again. And I started a new blog about writing, though I've been slacking a little there, too.
Alas, this is always my busiest time of the year. The time of year when I do too much. And then add a little more on top.
Over the next few weeks, I'm going to try to post some of the projects I've been doing over the last few months (and maybe even the year - who knows).
Today, I'm sharing this cute little dress I made for my niece, who is one and adorable (adorableness kind of goes without saying, but I'm saying it).
So, last Christmas, I promised my sister I'd make her little girl a dress...and then I forgot. And because she knows how busy I can get, she didn't say anything. But then I remembered a couple months ago (pre-Halloween), felt terrible and put it on my "To Do" list.
On Sunday, I finally got around to it.
I used McCall's Pattern # M5791, which I've used once before...years ago! It was the first dress I'd ever made. I liked it - but I think this dress turned out much better.
I constructed the little pinstriped section down the front myself.... (fabric and flower buttons from JoAnn's).
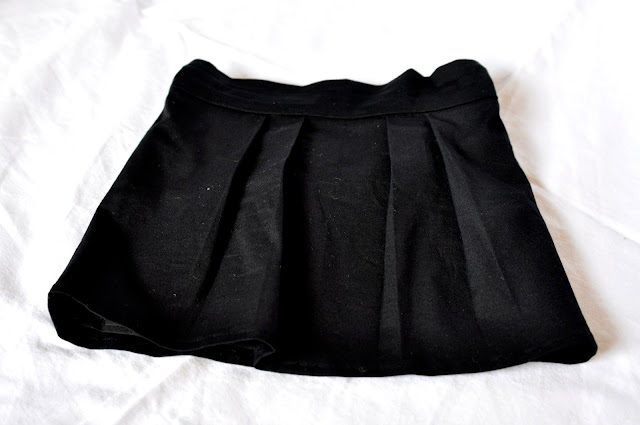
And then made the skirt longer with the plaid panel at the bottom.
I also only looked at the instructions once or twice to make sure I had the seam allowances right. Proof that I kind of know what I'm doing now. Huzzah for me!
Showing posts with label Children's Clothing. Show all posts
Thursday, November 21, 2013
Sunday, January 6, 2013
The Blessing Dress or How I Spent My Christmas Vacation
I know what you're thinking people: Stacy must be sitting on her hands doing nothing, nothing! Or dead. Whichever.
Not so!
I'm totally a lazy blogger though.
Taking pictures.
So much work.
Editing pictures.
So much more work.
Writing.....well, I have been doing that, but more on that later.
Until then, you can read about this lovely blessing dress I made last month...which was clearly not for me. I have a boy, people - who is six months old (can you believe that? No? Me either.).
Why did I agree to this? Well, the story is that back in May, my ward had a cake and service auction to raise money for the youth's summer programs. I made a cake (natch) and offered my services as a seamstress for a little girl. A friend of mine won my services but held off on taking me up on it, knowing that I had just had a baby and not wanting to take up too much of my time. It was always on my mind though and I felt like I just needed to fulfill that obligation ASAP.
I got a call from my friend in November. She said she had the perfect opportunity for me to perform my service - her sister was in need of blessing dress - the blessing was on December 30th.
I was going to spend December in my hometown in Oregon, where I wouldn't have much to do otherwise so I agreed.
I drafted my own pattern for the bodice (which she wanted to be simple) using the measurements that I'd been given. This baby was premature so she was smaller than any of the patterns I had access to. I drafted my own pattern for the little sleeves as well (I use this tutorial), wanting to keep them light and airy, so I used the same chiffon I used for the ruffles. They were planning to have the baby wear a little sweater over the top of the dress and I wanted to cut down on fabric bulk (I used Taffeta for the bodice and skirt).
(Buttons, my arch nemesis.)
The ruffles were the most challenging aspect of the dress. There are twelve and each had to be hemmed all the way around. Easier said than done. I think the buttons are the scariest part to do, though - you mess those up and you've ruined the whole dress!
Overall, I think the project turned out well - and my friend's sister absolutely loved it!
Tuesday, December 6, 2011
Gryffindor Halloween Costume - Part 4, Tie & Robes
Toddler Tie
For the tie, I used this tutorial over at the Purl Bee.
Robes
This is the part of the costume that I thought would be exceptionally difficult. You can't just go out and find a pattern for Harry Potter style wizards robes! That would be too ridiculously convenient!
My initial research led me to this website which shows you how to adapt a standard robe pattern into a Harry Potter style robe....for adults, anyway. I used the same method for a child sized robe.
The pattern I use was Simplicity pattern #2571. I scoured Joann's and the internets for fabric in the right color. I found some at Mood Fabrics - it's cotton poplin and I just love the maroon color. It just so happened that I had recently purchased a Groupon that gave me $30 worth of fabric for $15. Go me!
It took me a couple of days to adapt the pattern, which I thought was going to take me forever (!) - hence why I started in, like, August. But it went surprisingly fast and easy.
After the pattern was finished, I made a basic toile out of white fabric and it looked great! (I love when that happens!) However, that one won't be worn outside anytime soon - white robe with a pointy hood.....yeah, didn't think that one through. I'll have to add trim or lace or something to it in the future....can't let a good robe go to waste.
Here's my oldest modeling the toile.
Some improvements I made to the pattern - I added a lining to the whole thing, a side pocket and a wand pocket on the inside. For the neck closure I used a frog closure that I found at Joann's.
Frog closure:
Wand pocket:
Gryffindor Patch
The little Gryffindor patch was hand embroidered by yours truly.
(It was surprisingly difficult to get a good picture of this thing)
I found a picture of what the patch was supposed to look like, then scaled it down in Inkscape to the size I wanted. I printed it out and basically just eyeballed the design as I was sewing (I used a separate piece of leftover fabric and a small embroidery hoop). The pattern was just too small and the fabric too black (go figure!) to draw it out before I did it.
The finished product:
Can anyone argue against this little girl being the cutest Gryffindor ever? No? I didn't think so.
Tuesday, November 8, 2011
Mermaid Halloween Costume - Part 4, Tail
For Madeline's Mermaid Tail I used Simplicity pattern 4043.
Incidentally, a word about buying patterns - never (ever!) buy them at full price! Every few months Joann's has McCall's and Simplicity patterns for as little as 99 cents. Keep an eye on their ads!
Moving on.....
Not much to say about this part. I followed the instructions pretty close, except for the sequin aspect. They had suggested buying sequin trim (pre-sewn sequins that you just have to baste in place), but they are very expensive. I thought I could do a good job by hand so even though I had never done it before, I gave it my best shot.
Again, the method is really easy - sequin, bead, and then back through sequin hole again. I used seed beads and these plastic pearl beads I got from my Mom the last time I visited her house. (I pilfer craft supplies, what can I say?)
I sewed them on both sides of the tail. I alternated between the sides on every sequin/bead to make it easier on myself. In other words, I'd do one sequin/bead and then I'd flip it over and do a sequin/bead in the same spot on the other side.
I think it turned out well. It weighs a ton - not literally, but for a four year old, it was a tough proposition to carry it around while trick-or-treating.
Friday, November 4, 2011
Gryffindor Halloween Costume - Part 3, Skirt
I whipped this skirt up in a couple of hours. It's made of the same cotton poplin that I used for her robes.
It's basically two rectangles and a waistband. I also put in a lining. There are four 1/2 inch pleats in the front.
The front:
The back - there are three tiny pleats back there:
In retrospect, I should have made it bigger, but I was afraid I'd make it too big. Ah, my irrational fears.
I think it turned out great, though it wasn't part of the costume that would be seen by anyone. It was cute nonetheless.
Stay tuned for more! Up next is Evie's Gryffindor tie!
Friday, October 28, 2011
Mermaid Halloween Costume - Part 2, 'Mermaid' Top
For Madeline's top I used McCall's pattern M5732 (fairies) instead of the top that went with the tail for a couple of reasons. First, I was more concerned with modesty than being accurate to what a mermaid is supposed to look like. Secondly, it's October. In Pennsylvania. Hello, it's cold. A halter style top just wasn't going to cut it.
The top has two parts, the undershirt and the vest.
This is the vest:
I made it one size too big....but that means she can wear it for play longer, right? The sequin/bead clusters weren't a part of the original pattern, but the petals at the neck kept flipping upward and Madeline said it wasn't comfortable. So that's how I tacked the petals down.
For those of you who want to try sequins, they're really easy! It's just sequin, bead and then back through the sequin hole. Repeat. If you're using seed beads you'll need a beading needle, which are super fine, that you can get at any craft store.
And there you have it! Madeline's mermaid top!
Stay tuned for more!
Tuesday, May 17, 2011
Easy Cap Sleeves
Today I've got an easy way to add some cap sleeves to a sleeveless child's dress. (Note: You could do the same thing with an adolescent or adult dress as well if you can find lace trim wide enough).I bought this lovely purple dress (pictured to the left, sans the sleeves) on Walmart.com for $5.
Alas, there were no sleeves, but I bought it knowing that I am capable of making sleeves if I put aside my laziness. Still, I really wanted to do this the easiest way possible (read: laziest way possible - I mean, the dress has been hanging in the closet unaltered and unworn for a month).
So to minimize effort, I thought that if I could match the lace trim around the neckline with some trim I have in my lace hoard I wouldn't have to 'make' my own sleeves - I could just sew the lace in place and voilà !
And this is what I found in my lace box, right on top:

I thought it was pretty much perfect and I only had to spend a total of two minutes in what I have endearingly christened 'the Pit of Hell' - our storage unit - finding it.
Double win.
I took a few minutes to position it the way I wanted it (you can gather it if you want - I didn't on this one. You can see in the picture that this particular lace already has gathering stitches in it - a lazy sewers dream). I just laid it in there straight and tapered the ends in at the underarms so there wouldn't be chafing.
Tapering under the arms:

I actually sewed it to the little lip on the innermost edge of the hem fold, if that makes sense. It only gave me about 1/8 of an inch worth of fabric to work with so it was pretty tight. But you can't see the stitching from the outside, which is exactly what I wanted!
Serger-like stitch on hem fold:

Front:

Back:

Sweet and perfect. My girl just looks radiant in purple.
Saturday, April 30, 2011
50s Style Preschooler Dress
I wanted to make a spring dress for my three year old - it seems to be getting harder and harder to find anything acceptable in the stores - and I had this pattern from the 1950s from my Grandma's house that I wanted to try out. The pattern paper was still in pristine condition - impressive considering it's nearly a senior citizen.I did a couple of things I've never done before - like buttons. I don't really like how those turned out but I think I've finally gotten over it. An important lesson I've learned - don't make the buttonholes too close to the edge of your fabric. Also, don't work on a sewing project when you're ill.
The other thing I hadn't done before was altering the pattern - I was afraid that the bodice wasn't going to be wide enough so I added an inch. It turns out that it probably wasn't necessary but it looks good so I guess that's all that matters.

I made view #3 - minus the cummerbund and I added sleeves (shorter than the ones pictured in view #1). I also added a lining and the pin-tuck detail to the bottom of the skirt. Side note: I did make a cummerbund - but I didn't like it at all! Then I made a sash which didn't work either. I decided it was good enough as is.
Overall it came out well and I really do love this fabric. Madeline really seems to like it, too.
Wednesday, April 20, 2011
Sun Hats
I've been wanting to make sunhats for the girls for awhile and finally got around to it. Summer is quickly approaching!
I decided to make my own pattern because 1) it's fun and 2) because my firstborn's head has always been in the 99th percentile. Finding a child's hat that fits is a bit of a challenge.
You can buy a pattern, of course - McCall's has some cute ones like here and here.
I made paper test hats out of my patterns until I got it right (newspaper ads work great for this!) - three or four test hats later I had my patterns set.
(Evie wearing a paper test hat which was too small)

Below is Evie's almost finished hat. I added two more rows of stitching on her brim than what you see. We've had so few warm sunny days lately that I took the girls out for pictures before I was done.

Madeline's hat has a fabric flower on it that turned out pretty snazzy. I cut a strip of fabric about 40 inches long and 2 inches wide and finished all four edges with a Serger-like stitch (on my Brother machine it's stitch #6). Then I sewed one gathering stitch down the middle, gathered the fabric as tightly as I could and folded it in half lengthwise. Then I rolled it up and basted the flower base together with a needle and thread and attached it to the hat.

All in all, a fun learning experience. Hats are pretty easy to do if you're looking for a beginner project.
I decided to make my own pattern because 1) it's fun and 2) because my firstborn's head has always been in the 99th percentile. Finding a child's hat that fits is a bit of a challenge.
You can buy a pattern, of course - McCall's has some cute ones like here and here.
I made paper test hats out of my patterns until I got it right (newspaper ads work great for this!) - three or four test hats later I had my patterns set.
(Evie wearing a paper test hat which was too small)
Below is Evie's almost finished hat. I added two more rows of stitching on her brim than what you see. We've had so few warm sunny days lately that I took the girls out for pictures before I was done.

Madeline's hat has a fabric flower on it that turned out pretty snazzy. I cut a strip of fabric about 40 inches long and 2 inches wide and finished all four edges with a Serger-like stitch (on my Brother machine it's stitch #6). Then I sewed one gathering stitch down the middle, gathered the fabric as tightly as I could and folded it in half lengthwise. Then I rolled it up and basted the flower base together with a needle and thread and attached it to the hat.

All in all, a fun learning experience. Hats are pretty easy to do if you're looking for a beginner project.
Thursday, December 30, 2010
Little dresses Part 2
I hope everyone had an enjoyable Christmas. I'm currently in Utah enjoying (not really) the fresh snow fall.
I'm finally getting around to posting about the second dress I made - for my oldest daughter. I have to say that I've never been more excited to put the sewing machine away than I was when I finished this dress.
McCall's Pattern #5742
I chose the patterns I chose because I thought from my very inexperienced perspective that the two were similar....but the only similarity I found is that they're both dresses.
Square neck versus round neck. Petticoat versus no petticoat. Ruffled hem band versus straight hem band. This second one is more of a spanish style versus, I don't know, an American style. There were a lot of ruffles on this one...
I thought the sleeves were a bit easier to do, though. It took me less time but I think this one was harder. It did help that I kind of knew what I was doing on this second go around.
I left off some of the details that the pattern called for because I didn't want them to look too different - and I didn't want to do any more hand sewing. Yes, I'm lazy. I admit it.
Something I didn't like is that the bodice turned out of bit wide. On the next dress I make I'm going to make sure the bodice fits a bit better.
All in all, I thought this was a respectable second effort.

(Jazz Hands)
Stay tuned for posts in late January. I've got some fun projects lined up for when I return from my trip to the Homeland (Oregon).
I'm finally getting around to posting about the second dress I made - for my oldest daughter. I have to say that I've never been more excited to put the sewing machine away than I was when I finished this dress.
McCall's Pattern #5742
I chose the patterns I chose because I thought from my very inexperienced perspective that the two were similar....but the only similarity I found is that they're both dresses. Square neck versus round neck. Petticoat versus no petticoat. Ruffled hem band versus straight hem band. This second one is more of a spanish style versus, I don't know, an American style. There were a lot of ruffles on this one...
I thought the sleeves were a bit easier to do, though. It took me less time but I think this one was harder. It did help that I kind of knew what I was doing on this second go around.
I left off some of the details that the pattern called for because I didn't want them to look too different - and I didn't want to do any more hand sewing. Yes, I'm lazy. I admit it. Something I didn't like is that the bodice turned out of bit wide. On the next dress I make I'm going to make sure the bodice fits a bit better.
All in all, I thought this was a respectable second effort.
(Jazz Hands)
Stay tuned for posts in late January. I've got some fun projects lined up for when I return from my trip to the Homeland (Oregon).
Saturday, December 4, 2010
Little dresses
Lest you think I have dropped off the face of the planet, I'm here to say 'tis not so!
I've just retreated into stressed-out-about-Christmas-hermit-land from which I am emerging because I am DONE - yeah! Shopping done, packages mailed. I should get a freakin' gold medal!
Anyway, during my hermit-dom, I have, in fact, been making things!
Like this fancy little number:
McCall's Pattern #M5791
I saw this blue flocked taffeta at Joann's while I was scouring the Pennsylvanian countryside for Christmas ornaments and fell in LOVE. But I didn't get it just then. Seriously though, I couldn't stop thinking about. So I made a special trip to get it - the two closer stores didn't have it. It was a solid thirty minute drive both ways with two very bored children in the back of the car. I think I'm developing an unhealthy attachment to fabrics...
Anyway, it's for Ms. Pants, who is now the cutest nine-month old EVER. But I messed up on this dress SO MANY TIMES. I think some of my mess ups were just mind fatigue like 'I have to redo this AGAIN!? Why am I still working on this?! Someone PLEASE just finish this for me!'
This was the first time I had worked with a pattern so I learned a lot from trial and error. Zippers are not as hard as they may seem. Making an even gather is not so easy...Making a cloth bow is also not so easy. I really like how it turned out as long as I don't think about the visible errors.
Pants seems to like it, though:

Now to make a matching one for Ms. Madeline.
Yay....?
I've just retreated into stressed-out-about-Christmas-hermit-land from which I am emerging because I am DONE - yeah! Shopping done, packages mailed. I should get a freakin' gold medal!
Anyway, during my hermit-dom, I have, in fact, been making things!
Like this fancy little number:
McCall's Pattern #M5791
I saw this blue flocked taffeta at Joann's while I was scouring the Pennsylvanian countryside for Christmas ornaments and fell in LOVE. But I didn't get it just then. Seriously though, I couldn't stop thinking about. So I made a special trip to get it - the two closer stores didn't have it. It was a solid thirty minute drive both ways with two very bored children in the back of the car. I think I'm developing an unhealthy attachment to fabrics...Anyway, it's for Ms. Pants, who is now the cutest nine-month old EVER. But I messed up on this dress SO MANY TIMES. I think some of my mess ups were just mind fatigue like 'I have to redo this AGAIN!? Why am I still working on this?! Someone PLEASE just finish this for me!'
This was the first time I had worked with a pattern so I learned a lot from trial and error. Zippers are not as hard as they may seem. Making an even gather is not so easy...Making a cloth bow is also not so easy. I really like how it turned out as long as I don't think about the visible errors.
Pants seems to like it, though:

Now to make a matching one for Ms. Madeline.
Yay....?
Monday, November 22, 2010
Slippers
I said I was going to be making these AGES ago - well, maybe not ages, but it seemed like awhile - and I finally got around to it. They match the capelet I made for my niece a few weeks ago.
I was dreading the shoes because I found out that my little niece's feet are significantly smaller than the feet I used to make the pattern - even though Madeline is only 3 1/2 months older, her feet are ginormous (by the way, did you know that 'ginormous' is in the spell checker - who knew?). Anyway, I didn't even want to think about how I was going to re-size this pattern. I thought it was going to be a hassle. But when I finally sat down to do it (scanning it and resizing the image in Photoshop, using wiki's page about shoes sizes as a reference), it took me like ten minutes!
A couple things I did differently than the last pair was that I didn't stuff the soles and therefore didn't need to sew the middles to keep the stuffin' in place. I saved myself some work there. Also, I used corduroy which will undoubtedly hold up better than the satin-y stuff I used for the butterfly shoes. Also, I sewed the soles so that I could turn them and get a clean seam when I sewed the top of the shoes to the bottoms.
Overall I think they turned out well. I can't wait to see if they fit.
Merry Christmas to you Ms. Banana.
Thursday, November 4, 2010
Capelets
I found a pattern for capelets over at Prudent Baby. They have lots of fun, free patterns/tutorials.
Today I made my second capelet.
This was the first:
I made it for one of Madeline's friends for her birthday. I thought it turned out well, but being a slight perfectionist, there were a couple things that I didn't like about it. First was that the collar and cape were supposed to be contrasting and that was 100% my fault - I just sewed the thing together wrong. Second was that the straps were attached on the outside - which is what the tutorial said to do....maybe she thought it was more whimsical? I don't know, but I thought I could do better.
Here is my second attempt~~~~~~~~~~~~~~>
I whipped this puppy up today. I would have had my 'model' wear this except she had an accident and is hideous. Hideous!
I was going to do two normal cotton fabrics again and then I saw this corduroy and I couldn't help fanning my hands in excitement at how awesomely cute this was going to be. Okay, so there wasn't any hand fanning but this is stinkin' cute!
And below is a picture of the new and improved strap attachment! I thought it would make it harder to turn if I sewed them in, but it wasn't harder at all AND I LOVE how they look. So clean. So neat!
I'm going to be making some matching shoes to go with this (it's a Christmas present!) so stayed tuned!
Today I made my second capelet.
This was the first:
Here is my second attempt~~~~~~~~~~~~~~>
I whipped this puppy up today. I would have had my 'model' wear this except she had an accident and is hideous. Hideous!
I was going to do two normal cotton fabrics again and then I saw this corduroy and I couldn't help fanning my hands in excitement at how awesomely cute this was going to be. Okay, so there wasn't any hand fanning but this is stinkin' cute!
And below is a picture of the new and improved strap attachment! I thought it would make it harder to turn if I sewed them in, but it wasn't harder at all AND I LOVE how they look. So clean. So neat!
Subscribe to:
Comments (Atom)


